Showing posts with label tutorial. Show all posts

Monday, 2 September 2013

Great little picturegram from pinterest.


Fabulous wood carving from' The Physic Garden' Corbridge.


Thursday, 8 August 2013

Lovely little boxes from double sided origami paper.
To make each box you’ll need:
• four squares of paper for the lid and four for the base
• washi tape (any tape is fine, but washi is more forgiving if you make a mistake because it’s easily removed and repositioned)
the red thread patchwork origami boxes materials
Turn the paper over and tape it together.
Fold the four corners into the centre.
the red thread patchwork origami box step1
Now fold two opposite sides into the centre, then open again. Make sure you crease the folds well.
the red thread patchwork origami box step2
Now fold the opposite sides into the centre in the same way. Open them again.
Open two opposite sides right out.
the red thread patchwork origami box step3
Fold the two long sides up.
the red thread patchwork origami box step4
Take one end and fold it towards the centre. As you do this the box corners will fold inwards.
the red thread patchwork origami box step5
Fold the triangular end down into the box base. Repeat these two steps with the other end of the box.
the red thread patchwork origami box step6
That’s the box lid made.
To make the base start by sticking the four pieces of paper together with tape and then trim about 3mm (one eighth of an inch) off each side of the square. Then follow the same steps to make the base, which will fit neatly inside the lid.
The paper corners will sit neatly in the base and lid without needing to be secured, but you can add a bit of fun there with a sticker.
the red thread patchwork origami boxes group
Thanks to the Red Thread blog.

Monday, 22 July 2013

Make it Monday.

Here's where to find some great tutorials.
www.howaboutorange.blogspot.com


Make photographic prints with Inkodye (I have sourced Inkodye on Amazon).

Wednesday, 22 May 2013

Midweek meander

A beautiful way to view cooking which is in itself a creative process. We tend to loose sight of this in the day to day providing of food.


Want to make it.

Raspberry Tart
makes six 4-inch tarts

1/2 recipe sucree (recipe follows)
All-purpose flour, for work surface
Pastry Cream (recipe follows)
4 cups raspberries
confectioner's sugar for dusting

On a lightly floured work surface, roll out dough in a circle, about 1/4 inch thick. With a pastry brush, sweep off excess flour. Using a paring knife, cut the dough to fit into a 4-inch round fluted tart pan with a removable bottom, pressing into the edges and using thumb to remove excess dough. Continue with the remaining tart pans. Freeze tart shells until firm, about 30 minutes. 

Preheat oven to 375 degrees. Bake tart shell until golden all over, about 20 minutes. Cool tart shell completely on a wire rack. 

Spoon pastry cream mixture into cooled tart shell and spread evenly. Top with raspberries; dust with confectioner's sugar. Tart is best served the day it is made. 


Pastry Cream
1/2 cup milk
1/2 cup heavy cream
1 vanilla bean, split
3 large egg yolks
1/4 cup sugar
2 1/2 tablespoons all-purpose flour
1 teaspoon butter

In a small saucepan over medium heat, scald milk, heavy cream, and vanilla bean by bringing the mixture just to a boil. Remove from heat, cover, and let steep for 10 to 12 minutes. Remove vanilla bean.

In a small bowl, whisk together egg yolks and sugar until light and fluffy, about 2 minutes. Add flour and continue whisking until smooth. 

Slowly pour the hot-milk mixture into the egg mixture. Whisk until completely smooth. Return the mixture to the saucepan, and place over medium heat. Bring the mixture to a boil, whisking constantly, and cook for another 2 minutes. 

Remove the pastry cream from the heat and pass through a fine mesh strainer into a bowl. Add the butter and stir just until incorporated. Place a sheet of plastic wrap directly on top of the pastry cream to prevent skin from forming. Refrigerate until ready to serve. 


Pate Sucree
makes enough for 12 4-inch tarts

1/4 heavy cream
2 large egg yolks
2 2/3 cups all-purpose flour
1/4 cup granulated sugar
A pinch of sea salt
8 ounces unsalted butter, cut into pieces

Whisk the cream and the egg yolks together in a small bowl and set aside. In a large bowl, combine the flour, sugar, salt and butter. Using your fingers, incorporate the butter until you have a coarse meal. Gradually add the cream and yolks, and mix until just combined. Be careful not to overwork the dough. Bring the dough together with your hands to incorporate completely. Divide the dough in half, shape into disks, wrap with plastic wrap and chill. 

Thanks to 

Enjoy.

Tuesday, 16 April 2013

Midweek meander

Little worlds in a box are always a delight and fun to make, here are the instructions so that you can make one for yourself.


1. Find some old sweet tins or boxes.
2. Paint the background with watercolour on watercolour paper,
    try to build many layers to give your box dimension.
3. Cut out illustrations from old books for the cities and features in your box.
4. On the bottom of the golden one use clay to build the hill.
5. Rice paper was used for the clouds, let your imagination go wild.

Thursday, 11 April 2013

Midweek meander.

I thought you might like to learn how to make felt balls they are really lovely things with lots of uses.

What you need.
A small amount of coloured fleece, you can buy this in most craft shops.
Warm soapy water, washing up liquid is the best soap.

What you do.

Roll a fluffy bit of fleece into a loose ball shape.
Dip it carefully into the soapy water and reform  if necessary.
Keeping a fairly light touch start rolling it around in between your hands like rolling Plasticine into a ball.


Gradually increase the pressure as the ball starts firming up, re dip in the soapy water every now and then.
It is the heat and friction that makes the wool felt up, as it felts it will shrink and harden.


The small creases in the felt ball will come together as it shrinks.


The balls can be threaded together with a needle to make bracelets, necklaces or edgings, you can also use them for buttons and embroider on them. These have been threaded to use for decoration.

Wednesday, 6 February 2013

Midweek meander.

Valentines day is fast approaching and I found some lovely DIY stuff from How About Orange.


Find out  how to make them by visiting 

Have fun.

Wednesday, 4 July 2012

Midweek meander.

I have been asked a few times about covering boxes and making soft boxes for storage purposes, after surfing around here's two sites that should fit the bill, and if your anything like me it might just spur you on to tidy up that fabric stash. Follow the link for tutorials.


Fabric covered boxes from www.howaboutorange.blogspot.com


Baskets, buckets and boxes from www.whipup.net


No sew covered boxes.


Sewing box.


Storage cubes.

Enjoy making these tutorials your own.

Wednesday, 22 February 2012

Midweek meander.

I had a request for a tutorial on How To Print On Fabric with an inkjet printer so here we go.


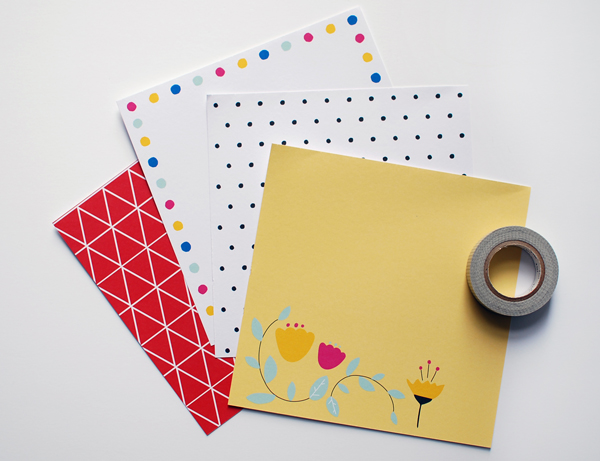
Step 1: You will need: Freezer Paper and a close weave fabric, cotton is good.


Step two: Using a piece of A4 card as a template, mark off an A4 sized piece of your freezer paper on the matte side. (I use the edge of the paper as one of the edges of my piece, saving extra cutting.)


Step three: Roughly cut around the outside of your marked out areas.


Step four: Set the iron to cotton and no steam.


Step five: Iron the fabric smooth (use a spray bottle if necessary, but ensure the fabric is completely dry before proceeding to the next step)


Step six: Iron the freezer paper onto the fabric, shiny side towards the fabric.


Step seven: Cut along the marked lines of the freezer paper.


Step eight: Clean up any dangling threads.(You don't want to kill your printer now, do you?)

Step nine: Choose the image that you want to print from your files or set up text for labels etc through word.

Step ten: Insert your fabric/ freezer paper piece into your printer, making sure the fabric is the side that will be printed. Set your printing preferences to best quality printing and hit print.


Step eleven: Leave it to set for a few minutes then carefully peel the fabric off the freezer paper backing.
Step twelve: Heat set your print by ironing on the wrong side for approximately three minutes (Or until you get bored.).
Your done.

This fabric is only good for projects that you will not wash, if you want a colour fast fabric there is a product called 'Bubble Jet 2000' which you soak the fabric in before you prepare it for printing or you can buy packs of A4 prepared fabric for printing onto.

Now what project do you have in mind?

Monday, 20 February 2012

Make it Monday.

Fancy making something this week here are some good ideas and tutorials.


This pretty basket is basically rag wrapped piping cord.


Can't remember where I found this lovely necklace tutorial, knotty fun.


Finally some inspiration for those of you who joined us and had a great day at 'Studio 15' on Friday.


Bracelet cuffs.


Little purses or phone/Ipod cases.


Tote bag.

Monday, 7 November 2011

Search and learn.

Thanks to the internet everything is there to watch and learn, here are four little videos from you tube. These videos are for those of you who are new to stitch, or maybe new tips for the more experienced as well. How to tie a knot, seems simple enough but this is a technique that I hadn't come across before and so simple.
All of these videos are to help get you started and to give you links to a whole host of others, its all out there, just click on view on you tube and you will get a list of related videos, above them is a search bar to type into, happy hunting.


or your own drawings.


one quick way of adding colour.


one of the outline stitches.

What are you waiting for lets get creative.

Monday, 3 October 2011

Eco craft ideas.

In this economic climate we are all looking for ways to save money and even better to try to reduce waste and reuse things we would previously have thrown away. I'm often surfing the net looking for eco ideas and this week I came across these great little videos by Shiho Masuda on you tube.
Brilliantly simple crafting.


All there is left to say is upcycle, upcycle, upcycle.

Monday, 26 September 2011

1970's raffia flowers.


I remember making these (guess that gives my age away) we used to use nails in wood for a loom. I still think they are great, this tutorial is from www.cathyofcalifornia.typepad.com please resect her wishes at the bottom of the page. 

flower loom tutorial - here's how to make a basic flower

Tutorial

For this how-to I’m using a vintage Studio Twelve “Multi-Fleur” loom. It’s about 3 ½” across and has 2 rows of pegs. The pegs are numbered 1-12 going counter clockwise. When you are first learning it’s probably a good idea to follow the numbers but honestly once you get the hang of it you don’t really need to.
You can use yarn, ribbon,string and even wire on a flower loom - but for a real 60s-70s look you'll want to use raffia. I love the look of the vintage swiss straw–especially the colors and textures . But the synthetic raffia now marketed as gift ribbon is basically the same thing. The raffia I used for this tutorial is from Rafft Ribbons. Paper Mart offers a less expensive option. Just make sure it's synthetic and not paper raffia as paper raffia tears. Natural raffia I have found is too thick. Try experimenting with different materials- you never know what you'll come up with!
STEP 1
Start with 36” tail and secure material in the notch near peg #7. Working counterclockwise wrap your material around each of the outer pegs. You work in a "figure 8" as you wrap the material around opposite pegs (1 to 7, 2 to 8, 3 to 9, 4 to 10, 5 to 11). Each time all the way around the loom creates 1 layer. Go completely around 2 to 3 times (i.e. 2 - 3 layers). Secure end in notch leaving an 8” tail.
Photoone
How to wrap the material around the pegs in a "figure 8".
Two
The first layer


STEP 2
Repeat step 1 except do the inner pegs with a different color. 1 - 2 layers is good. This time you only need to leave 8” tails.
Three
The second layer.

STEP 3 - THE BACK STITCH
Using a long sharp craft needle w/ a big eye and thread the 36” tail (from step one). Come up at space 11 and down through space 12, up space 1 down space 12, up space 2 down space 1, up space 3 down space 2 and so on until you go all the way around. Make sure you go in between the petals and do not pierce the material.
Four
Detail of back stitch.
Five
Completed back stitch.

STEP 4 - SLANT STITCH
You should have ended up at space 1 from your previous step. Go over 3 spokes to the right and go in between the petal and come back up at space 12 (2 petals to the left), over 3 spokes and down through the petal. Repeat all the way around and complete the final stitch by going under the first slant stitch to create a continuous look.
Six
Detail of Slant Stitch
Seven
Completed Slant Stitch

STEP 5
Turn loom over and secure by knotting tails and snip off excess. Gently remove flower from loom.
Eight
This is what the flower looks like right after you take it off the loom.

STEP 6
Fluff the petals as desired.
Nine
Fluffed flower!

Hope you enjoyed this tutorial! This shows you how to make a basic flower. I think it's always best to get the basics down first. You will then be ready to play around with different ideas and have some fun. There are many ways to use a flower loom and tons of options and variations.
I would also like to point you in the direction of the amazing Knitting -and website where you will find some more advanced flower loom tutorials that should be of help.
PLEASE NOTE: I have studied and read many vintage books on the use of flower looms. I have written this tutorial based on my knowlege and the way I use my flower looms. The words and photography are mine.
This tutorial is intended for PERSONAL USE ONLY. You are more than welcome to make copies of it for yourself. PLEASE DO NOT MAKE COPIES TO SELL ON EBAY. Thanks!