Lovely little boxes from double sided origami paper.
To make each box you’ll need:
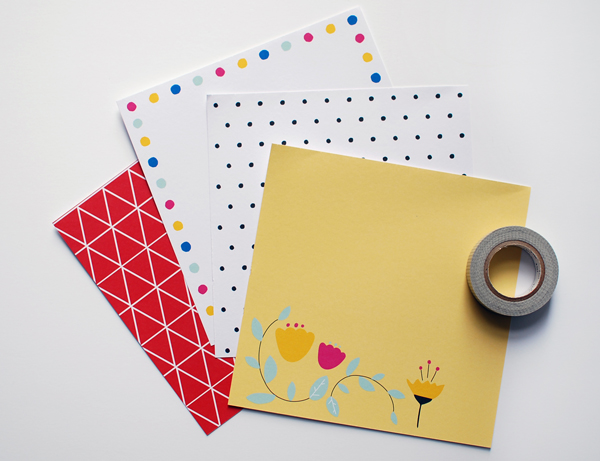
• four squares of paper for the lid and four for the base
• washi tape (any tape is fine, but washi is more forgiving if you make a mistake because it’s easily removed and repositioned)
Turn the paper over and tape it together.
Fold the four corners into the centre.
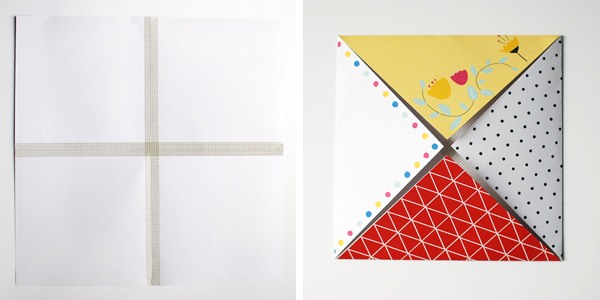
Now fold two opposite sides into the centre, then open again. Make sure you crease the folds well.
Now fold the opposite sides into the centre in the same way. Open them again.
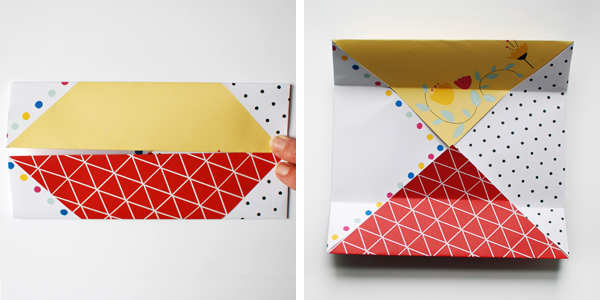
Open two opposite sides right out.
Fold the two long sides up.
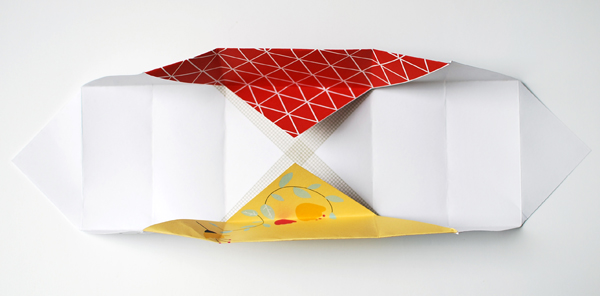
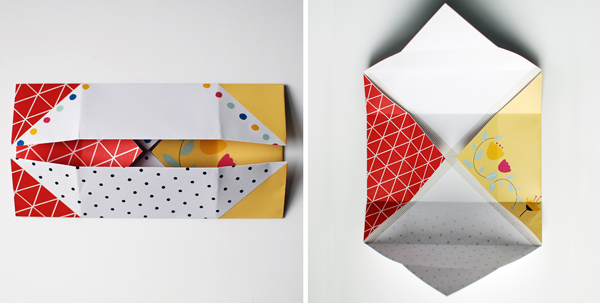
Take one end and fold it towards the centre. As you do this the box corners will fold inwards.
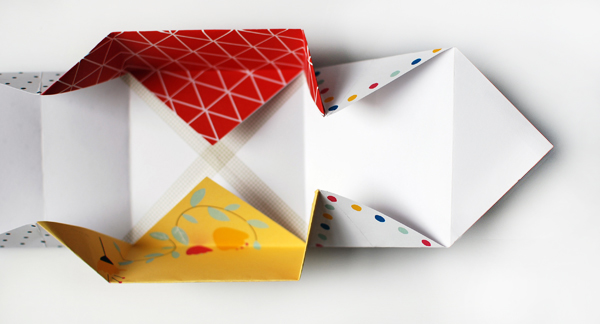
Fold the triangular end down into the box base. Repeat these two steps with the other end of the box.

That’s the box lid made.
To make the base start by sticking the four pieces of paper together with tape and then trim about 3mm (one eighth of an inch) off each side of the square. Then follow the same steps to make the base, which will fit neatly inside the lid.
The paper corners will sit neatly in the base and lid without needing to be secured, but you can add a bit of fun there with a sticker.
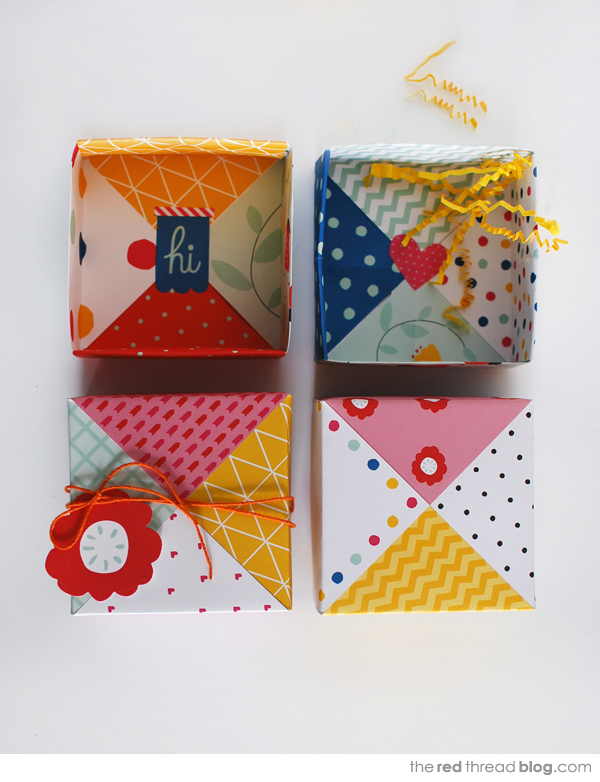
Thanks to the Red Thread blog.
2 comments:
What an excellent idea. Useful boxes for so many things.
What an excellent idea, suitable for so many things.
Post a Comment